I love coloring, and I know how tricky it can be to get those details right. Especially when you’re just starting out. But hey, colorear nezuko dibujo facil doesn’t have to be a headache.
This tutorial is all about making it simple and fun.
You might be thinking, “Can I really do this?” Yes, you can! We break it down step by step, so you can follow along without getting overwhelmed. No fancy tools or techniques here—just clear, easy-to-follow instructions.
So, let’s dive in and make your Nezuko drawing look amazing. Trust me, you’ll be surprised at what you can create.
Materials Needed for Coloring
Let’s get real. Picking the right materials can be a headache. You want to make your Nezuko drawing look amazing, but where do you start?
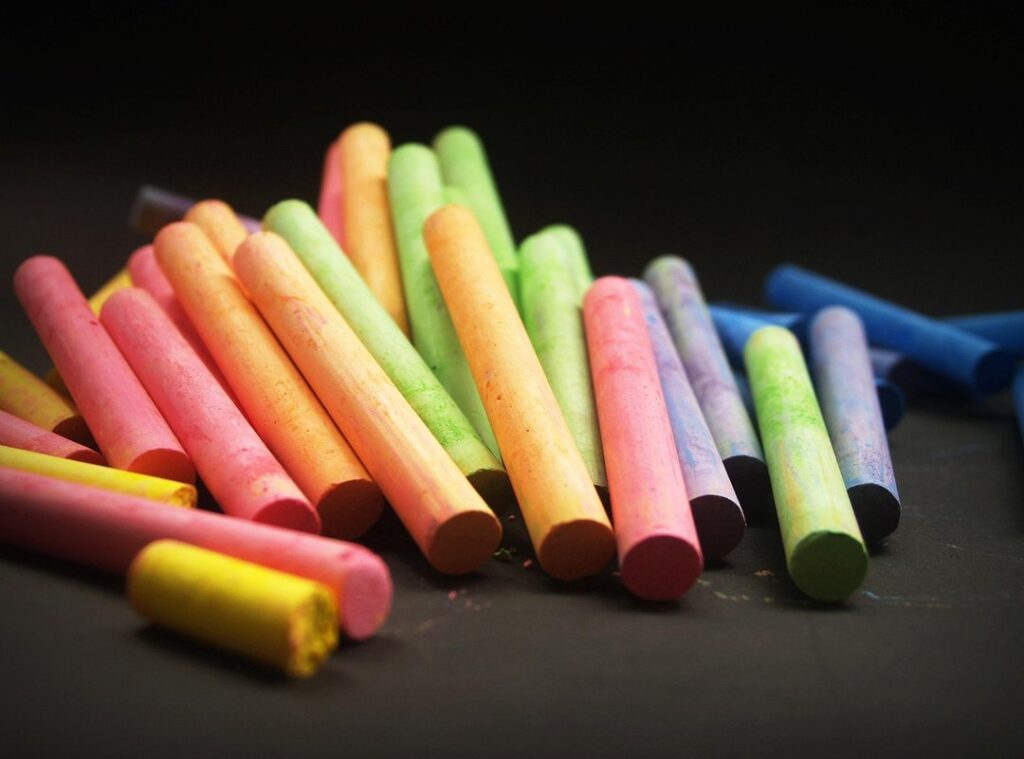
First up, you’ll need some colored pencils, markers, or crayons. Each has its pros and cons. Colored pencils are great for detailed work, but they can be a pain if you’re in a hurry.
Markers give you bold, vibrant colors, but they can bleed through paper. Crayons? They’re easy to use, but not so great for fine details.
Next, you’ll need a printed or digital colorear nezuko dibujo facil. This is your canvas. Make sure it’s good quality; nothing worse than working on a blurry, low-res image.
Don’t forget an eraser and a pencil. Mistakes happen, and you’ll want to clean them up without ruining your work. An eraser is your best friend here.
A blending tool is optional, but it can really make your colors pop. It’s like the cherry on top of a sundae—nice to have, but not a must.
Now, let’s talk about setting up your workspace. Clear off a table, grab some good lighting, and make sure you have enough room. Clutter can be a major distraction.
Trust me, you don’t want to be bumping into things while you’re in the zone.
Preparation is key. Lay out all your materials before you start. There’s nothing more frustrating than getting into the flow and realizing you left your favorite marker in another room.
So, take a deep breath, gather your tools, and get ready to bring Nezuko to life. Happy coloring!
Understanding Nezuko’s Color Palette
Let’s dive into the color reference for Nezuko. Her hair is a vibrant pink, her eyes are a striking red, and her clothing is a mix of traditional Japanese patterns with a lot of white and green.
Hair: Use a base pink and add lighter shades for highlights where the light hits.
Eyes: Start with a deep red and use darker tones for the pupils and lighter tones for the reflections.
Clothing: White with green accents.
Add shadows with a slightly darker shade of the base color.
Shading and highlights are key to making your drawing pop. Use lighter shades to show where the light is hitting and darker shades to create depth and shadow. This adds dimension and makes Nezuko look more lifelike.
Color theory can help you pick the right colors. Complementary colors (like pink and green) make each other stand out, while contrasting colors (like red and white) add visual interest.
Pro tip: Practice with simple sketches first. Try colorear nezuko dibujo facil to get a feel for the colors before moving on to more detailed drawings.
Keep it fun and don’t be afraid to experiment!
Step-by-Step Coloring Guide
Colorear nezuko dibujo facil can be a fun and rewarding experience. Let’s break it down into simple steps.
Step 1: Base Colors
Apply the base colors to Nezuko’s hair, skin, and clothing. This is your starting point, so take your time to get the right shades.
Step 2: Shading
Add shading to create depth and dimension. Focus on areas like the hair, face, and clothing folds. Shading helps make the drawing look more three-dimensional and realistic.
Step 3: Highlights
Use lighter colors to add highlights. This gives the drawing a more realistic and dynamic look. Think about where the light would naturally hit her, like the top of her head or the edges of her kimono.
Step 4: Details
Add small details such as the pattern on her kimono, the texture of her hair, and the reflections in her eyes. These little touches can really bring the drawing to life. Hearthssconsole
Remember, practice makes perfect. Don’t be afraid to experiment and try different techniques.
Tips and Tricks for Better Results
Blending Techniques: How to blend colors smoothly using different tools and techniques. It’s all about finding the right tool for the job. Whether you’re using a blending stump, your fingers, or even a bit of water, the key is to experiment and see what works best for you.
Layering: The importance of layering colors to build up rich, vibrant hues. This is where the magic happens. By adding layers, you can create depth and dimension in your artwork.
It’s like building a cake—each layer adds more flavor and texture.
Consistency: Tips for maintaining consistent pressure and color application throughout the drawing. Consistency is key. If you vary your pressure too much, your drawing can end up looking patchy.
Try to keep a steady hand and apply even pressure.
One trick I’ve found really helpful is to practice on a separate piece of paper first. This way, you can get a feel for how the colors mix and how much pressure you need. (It’s like a warm-up before the big game.)
Another thing to keep in mind is the type of paper you’re using. Different papers have different textures, and this can affect how your colors blend and layer. For example, if you’re working on a colorear nezuko dibujo facil, you might find that a smoother paper gives you better results.
By mastering these techniques, you’ll be able to create more polished and professional-looking artwork. And who doesn’t want that?
Common Mistakes and How to Avoid Them
Overworking the drawing is a common pitfall. It’s easy to get carried away with blending and layering. But too much of it can make your artwork look muddy.
Trust me, I’ve been there. It’s like when you keep adding more seasoning to a dish, and suddenly it’s just a salty mess.
Ignoring references is another big mistake. Using reference images can help you nail the accuracy and consistency in your work. For example, if you’re drawing colorear nezuko dibujo facil, having a good reference will make sure you get those details right.
Without them, your drawing might end up looking off.
Rushing the process is something we all do, especially when we’re excited. But patience is key. Taking your time allows you to catch small mistakes and refine your work.
It’s the difference between a rushed, sloppy drawing and one that really stands out.
Frequently Asked Questions (FAQs)
Q1: What if I don’t have the exact colors mentioned in the guide?
Don’t worry! You can still create a beautiful colorear nezuko dibujo facil.
Use the closest shades you have. The key is to enjoy the process and make it your own.
Q2: Can I use this guide for other characters as well?
Absolutely! The techniques and tips in this guide are versatile.
They can help you color any character, not just Nezuko. It’s all about getting creative and having fun.
Q3: How can I fix a mistake if I make one while coloring?
Mistakes happen. If you mess up, try using an eraser or white paint to cover it.
Then, start again. Remember, practice makes perfect, and every mistake is a learning opportunity.
Mastering Nezuko Coloring
Recap the key steps and tips for coloring a colorear nezuko dibujo facil. Start by selecting the right colors that match Nezuko’s iconic appearance. Use light strokes to build up color gradually, adding depth and shading to bring her to life.
Emphasize that with practice and patience, you can create beautiful, vibrant Nezuko drawings.
Encourage readers to share their work and continue practicing to develop their skills further.
 Ask Franklin Zitostin how they got into esports highlights and you'll probably get a longer answer than you expected. The short version: Franklin started doing it, got genuinely hooked, and at some point realized they had accumulated enough hard-won knowledge that it would be a waste not to share it. So they started writing.
What makes Franklin worth reading is that they skips the obvious stuff. Nobody needs another surface-level take on Esports Highlights, Console Gaming News, Game Reviews and Updates. What readers actually want is the nuance — the part that only becomes clear after you've made a few mistakes and figured out why. That's the territory Franklin operates in. The writing is direct, occasionally blunt, and always built around what's actually true rather than what sounds good in an article. They has little patience for filler, which means they's pieces tend to be denser with real information than the average post on the same subject.
Franklin doesn't write to impress anyone. They writes because they has things to say that they genuinely thinks people should hear. That motivation — basic as it sounds — produces something noticeably different from content written for clicks or word count. Readers pick up on it. The comments on Franklin's work tend to reflect that.
Ask Franklin Zitostin how they got into esports highlights and you'll probably get a longer answer than you expected. The short version: Franklin started doing it, got genuinely hooked, and at some point realized they had accumulated enough hard-won knowledge that it would be a waste not to share it. So they started writing.
What makes Franklin worth reading is that they skips the obvious stuff. Nobody needs another surface-level take on Esports Highlights, Console Gaming News, Game Reviews and Updates. What readers actually want is the nuance — the part that only becomes clear after you've made a few mistakes and figured out why. That's the territory Franklin operates in. The writing is direct, occasionally blunt, and always built around what's actually true rather than what sounds good in an article. They has little patience for filler, which means they's pieces tend to be denser with real information than the average post on the same subject.
Franklin doesn't write to impress anyone. They writes because they has things to say that they genuinely thinks people should hear. That motivation — basic as it sounds — produces something noticeably different from content written for clicks or word count. Readers pick up on it. The comments on Franklin's work tend to reflect that.